RX4 Adventure Oil Change
This tutorial addresses changing the RX4 oil.
We have added an 500 Mile Oil Change Kit for the RX4 Adventure to our website. You can get all the parts you need to complete your first oil change here: https://cscmotorcycles.com/500-mile-oil-change-kit-for-the-rx4-adventure/
General Information
Procedure
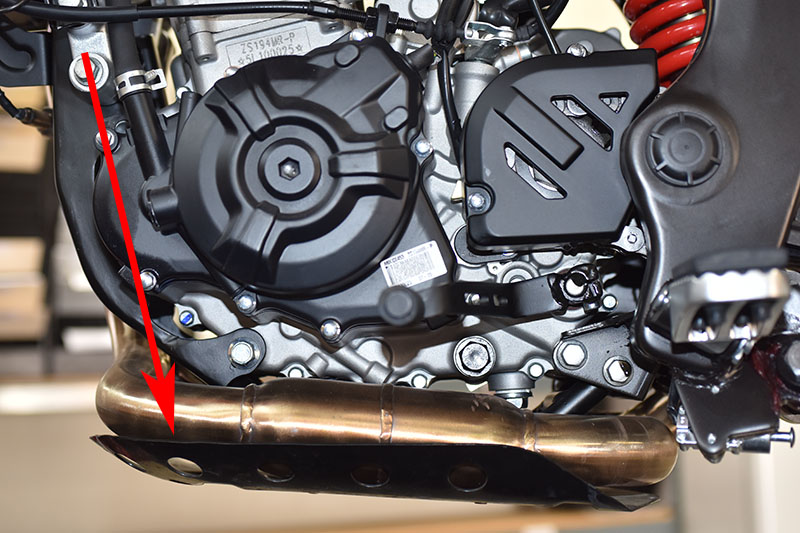
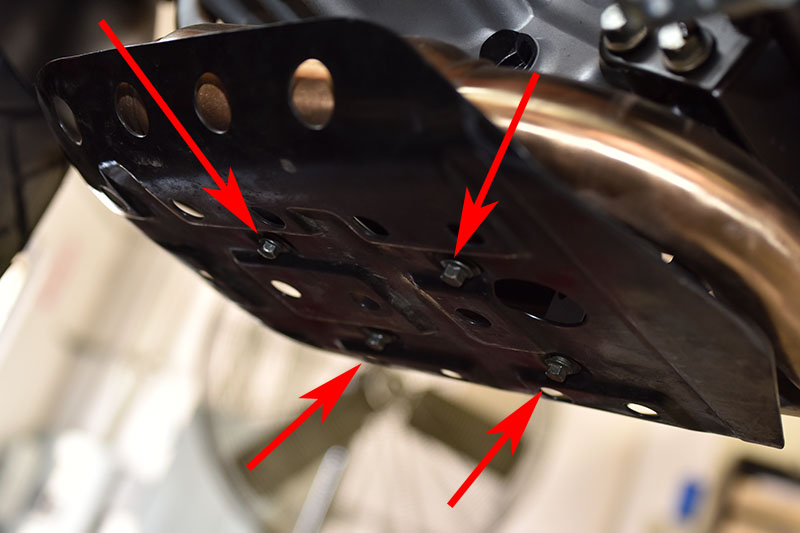
Remove the engine skid plate. The skid plate is attached by four 8mm bolts. Remove the skid plate and set it aside.
Run the engine for a few minutes to warm the oil. This will allow it to drain easily from the engine. After the engine has warmed, turn off the motorcycle. Exercise caution when working on the motorcycle after warming the engine because the exhaust pipe and other components will be hot.
Position a drain pan beneath the engine. Remove the oil drain plug on the bottom of the bottom of the crankcase (the drain plug takes a 17mm bolt head).
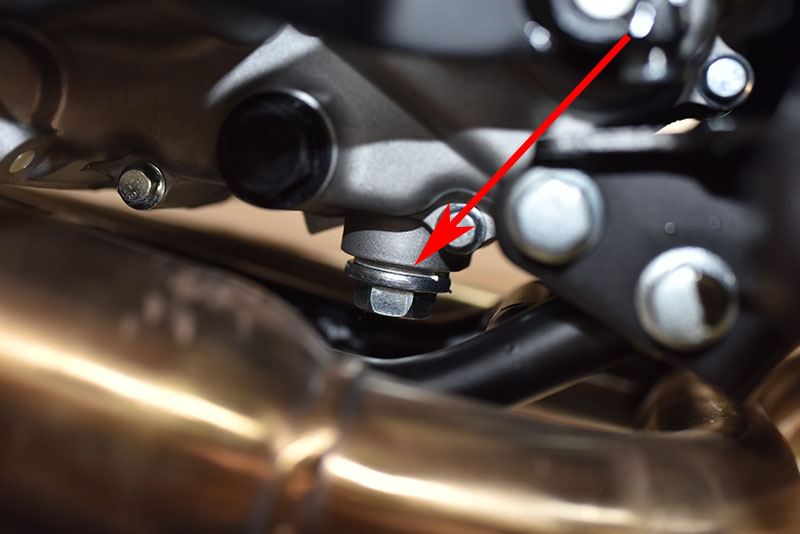
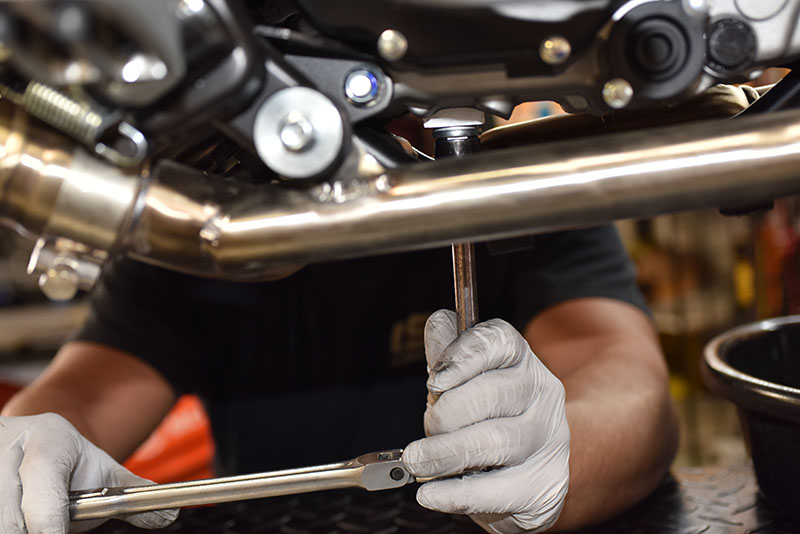
The drain plug has a magnetic core to pick up bits of iron in the engine. The magnetic feature will come in handy a bit later for removing the oil filter (to be explained shortly). Clean the metal filings off the drain plug magnet after removing it.
There are two oil strainers on the RX4 engine. Each is secured and sealed with a cap on the engine crankcase. One is on the right side of the engine; the other is on the left side of the engine. These are shown below:
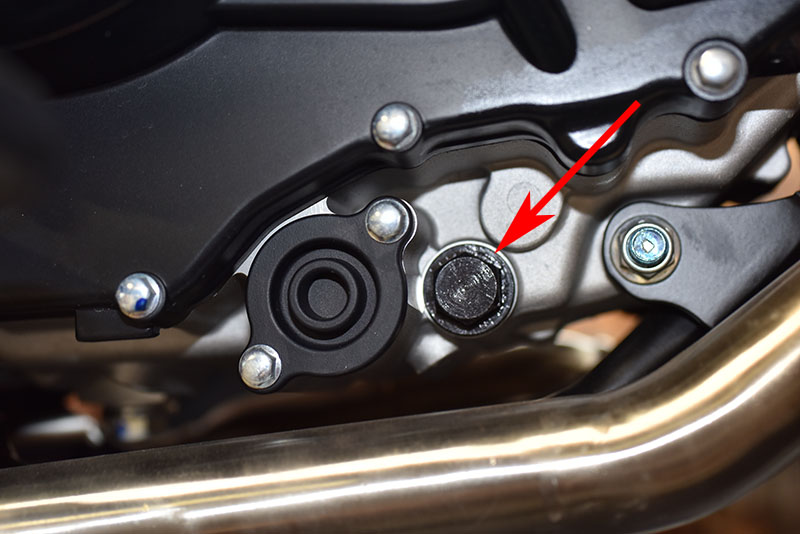
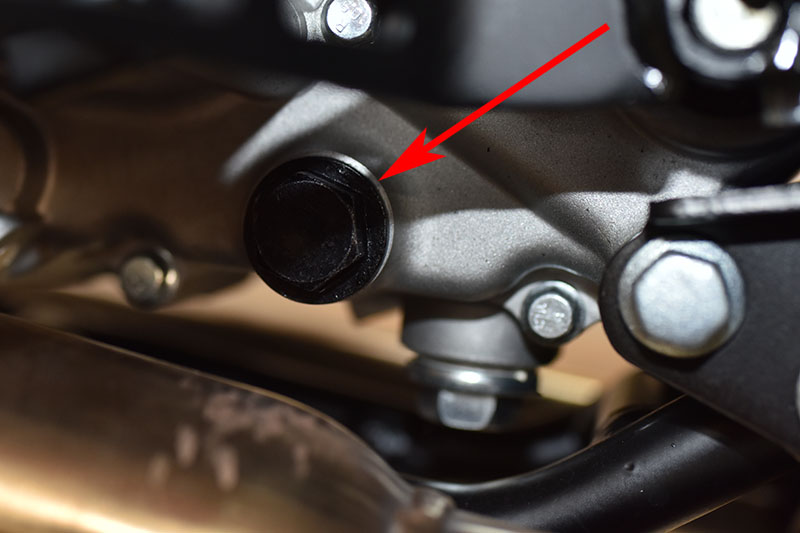
The oil strainer caps are removed with a 17mm socket. When these are removed, oil will drain from the engine, so make sure the oil pan is beneath the oil strainer cap area.
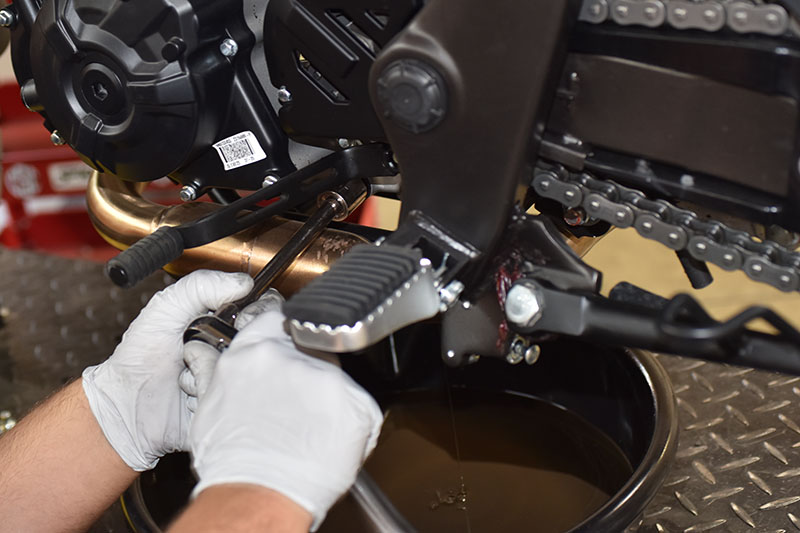
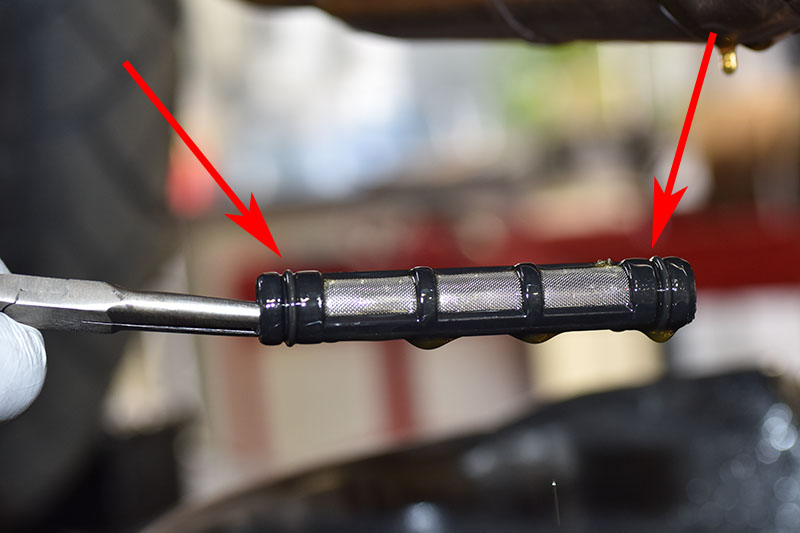
Remove the oil stainers from the left and right side of the motorcycle. You can pull the oil strainers out of the engine using a pair of needle-nosed pliers.
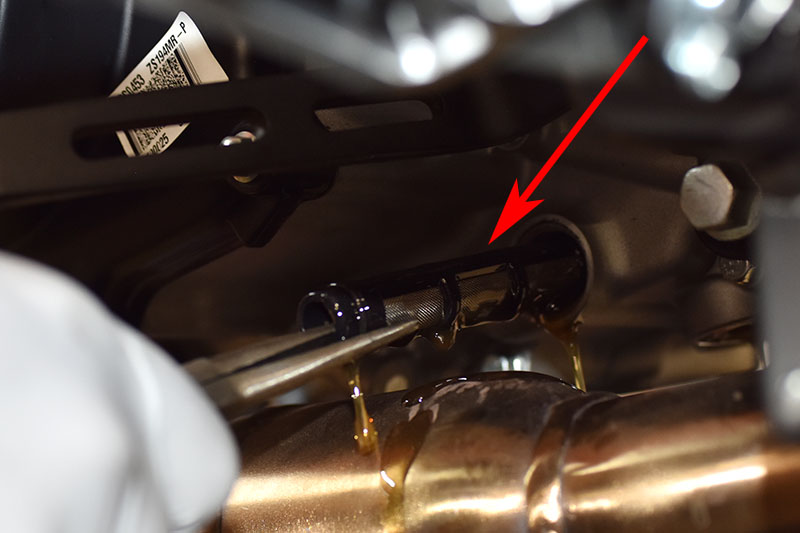
Set the oil strainer covers aside, taking care not to lose the o-rings on the strainers.
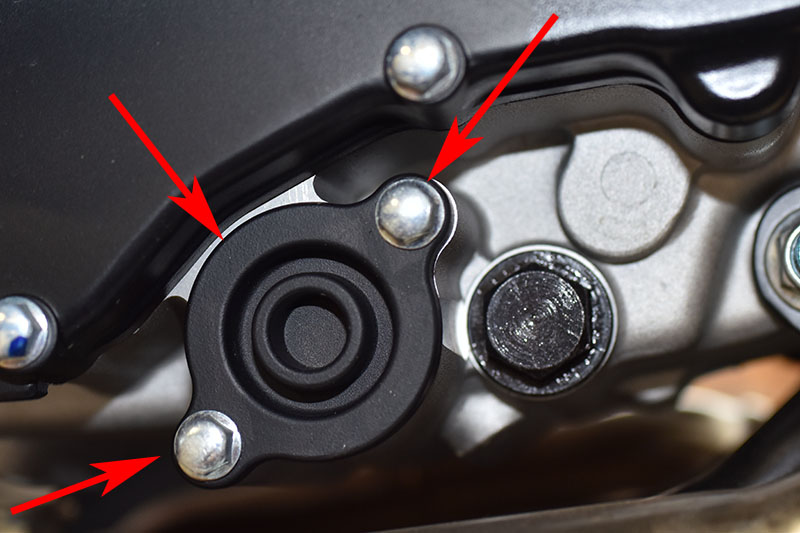
Remove the oil filter cover. It is secured by two 8mm bolts.
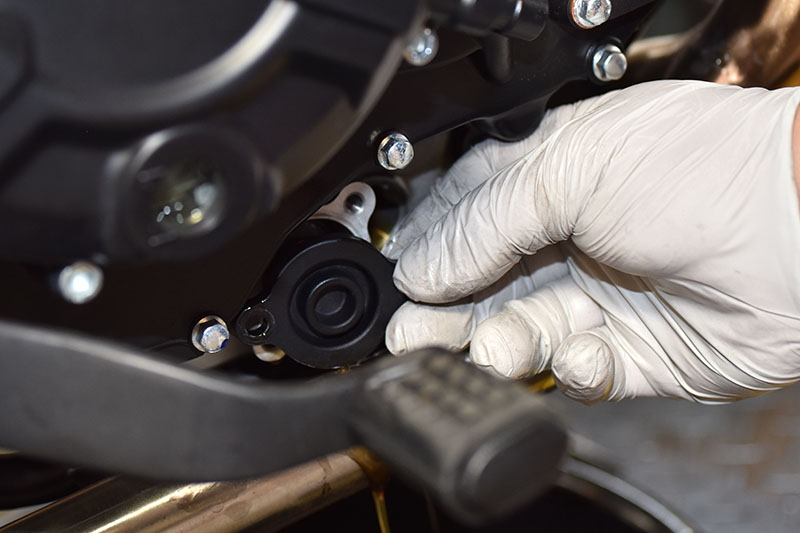
The oil filter cover has a spring inside that fits between it and the oil filter. The oil filter cover and its spring look like this.
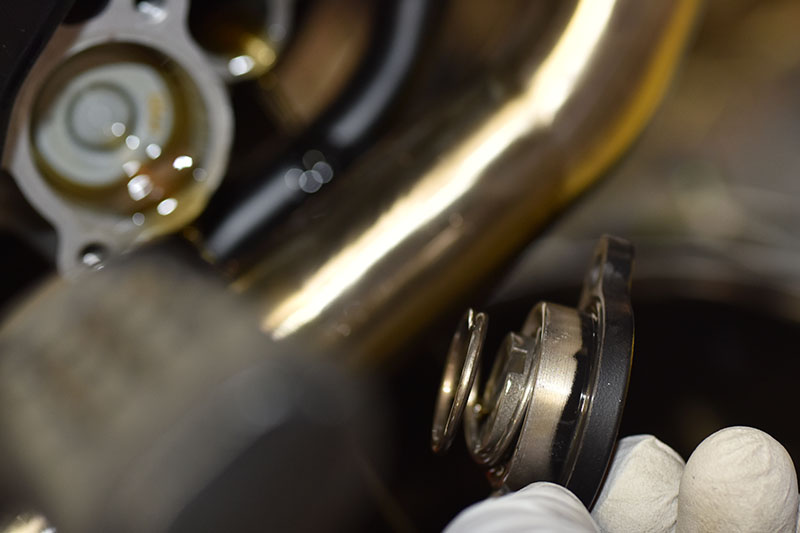
The oil filter cover also has an o-ring. Take care not to get the o-ring dirty or lose it. The spring is orientation insensitive; it can be inserted either way.
Once you have removed the filter cover, you’ll see the metal end of the oil filter.
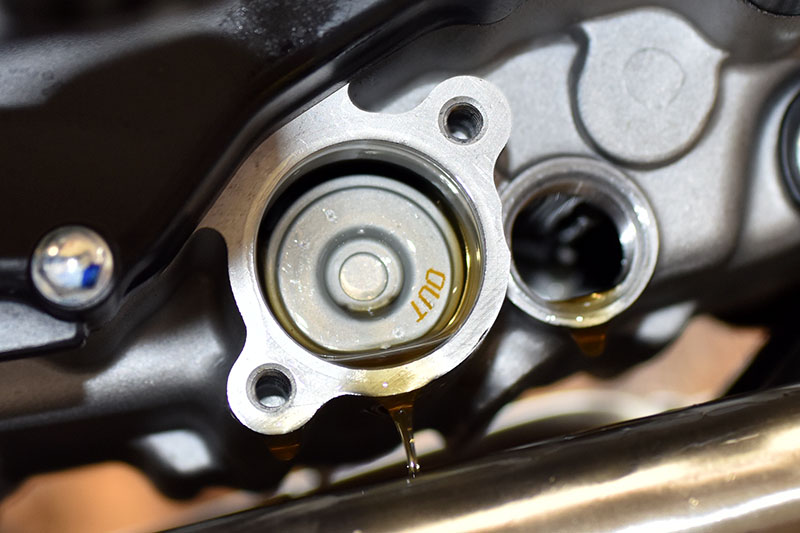
You can remove the oil filter with a magnet. The tip of the oil drain plug contains a magnet that is useful for withdrawing the filter. In the photo below, the CSC technician is using a magnet mounted on a probe, but the oil drain plug works just as well.
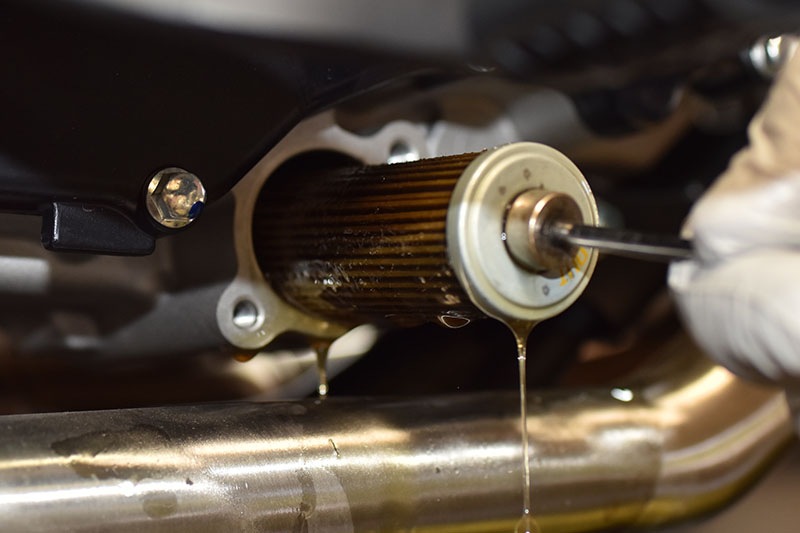
Note that the oil filter is not reversible. The end with the rubber gasket goes into the engine first. Do not attempt to clean the oil filter; you should install a new oil filter with each oil change.
Clean the oil strainers, the oil drain plug, the oil strainer caps, and the oil filter cover and spring using WD 40 or compressed air with a suitable cleaning agent.
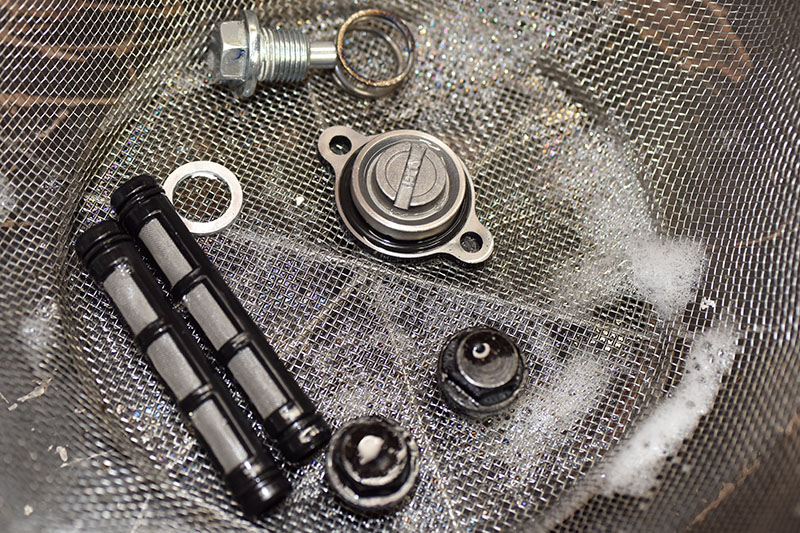
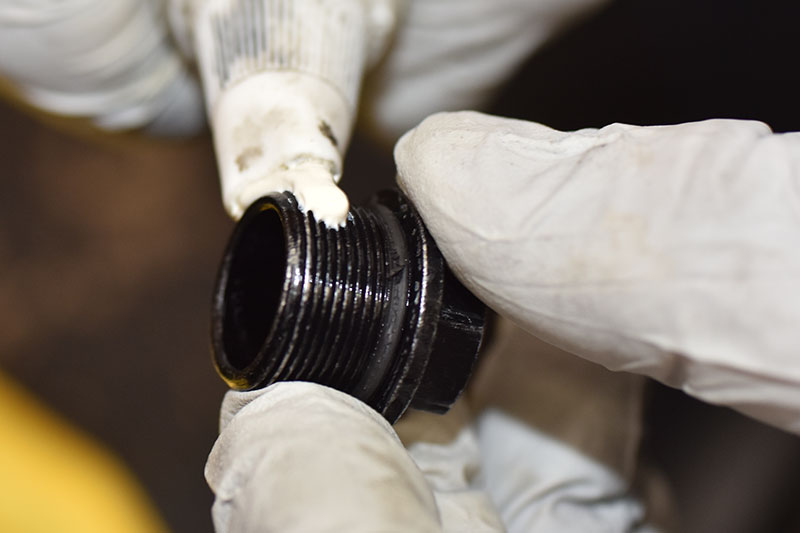
After the above parts have been cleaned and dried, apply anti-seize compound to the threads on the oil strainer caps, the oil drain plug, and the oil filter cover bolts.
After removing the oil filter and the oil strainers, additional oil will drain from the engine. Hold the bike in the vertical position so that any remaining oil will drain from the crankcase.
After all oil has drained from the engine, reinstall the oil strainers. The oil strainers are the same on either side of the engine, but they are different on each end of the strainer. Make sure you install the thin end of the oil strainer first. After installing the oil strainers, install the oil strainer caps.
Install a new oil filter. The end with the black rubber gasket goes into the engine first.
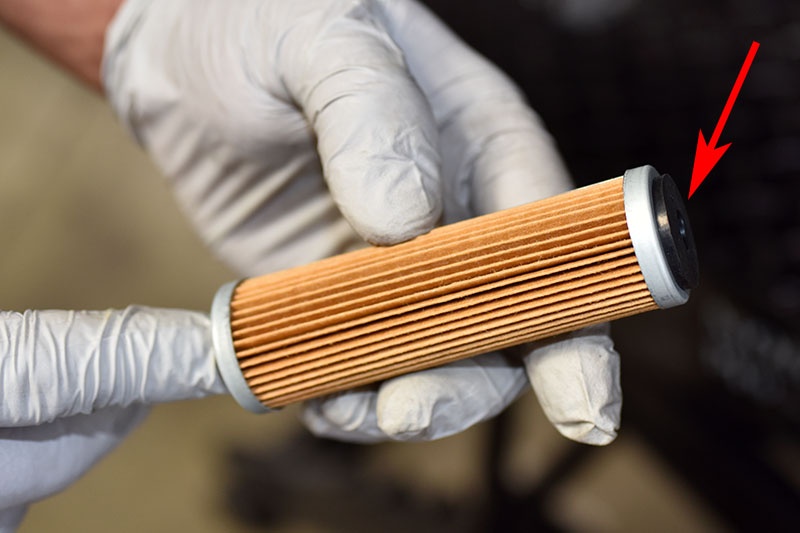
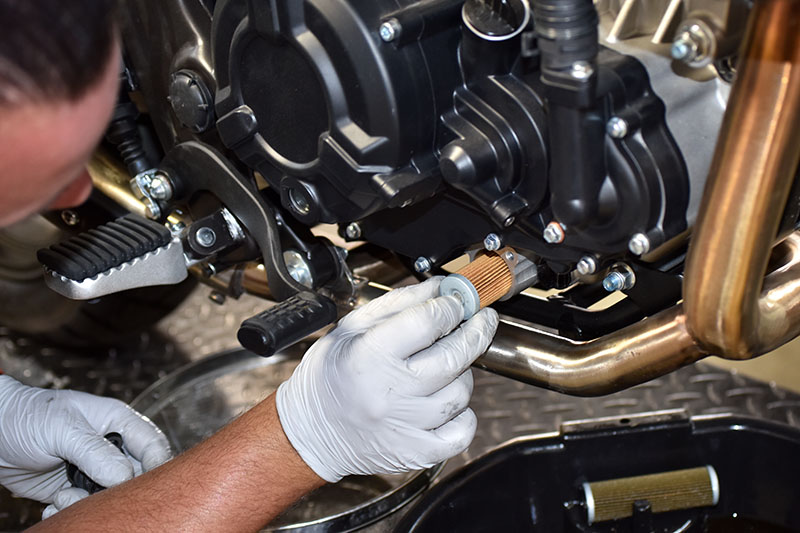
After inserting the oil filter in the engine, replace the oil filter cover and spring and secure it with the two 8mm bolts. Take care not to apply excessive torque; it is very easy to strip the engine crankcase threads if these bolts are overtightened.
Reinstall the oil drain plug. Use a new crush washer.
Reinstall the engine skid plate.
Unscrew the oil fill plug on the right side of the engine.
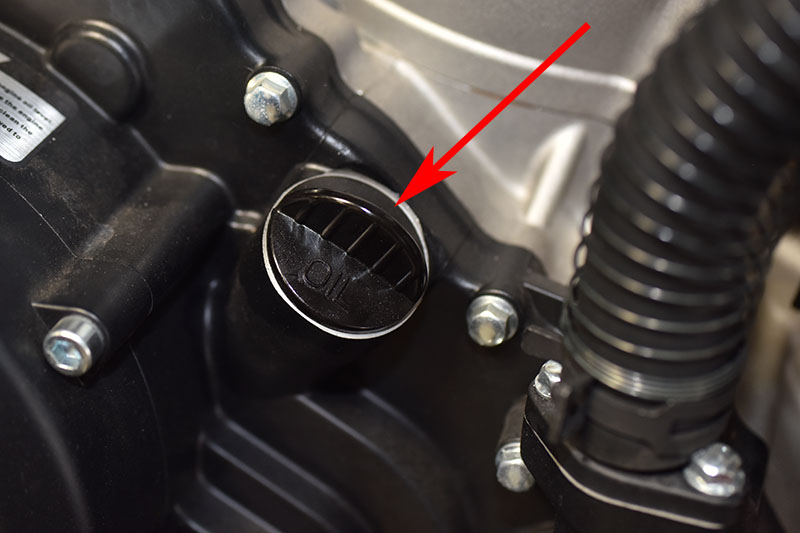
Add 2 quarts of oil to the engine through the oil fill port.

Reinstall the oil fill plug.
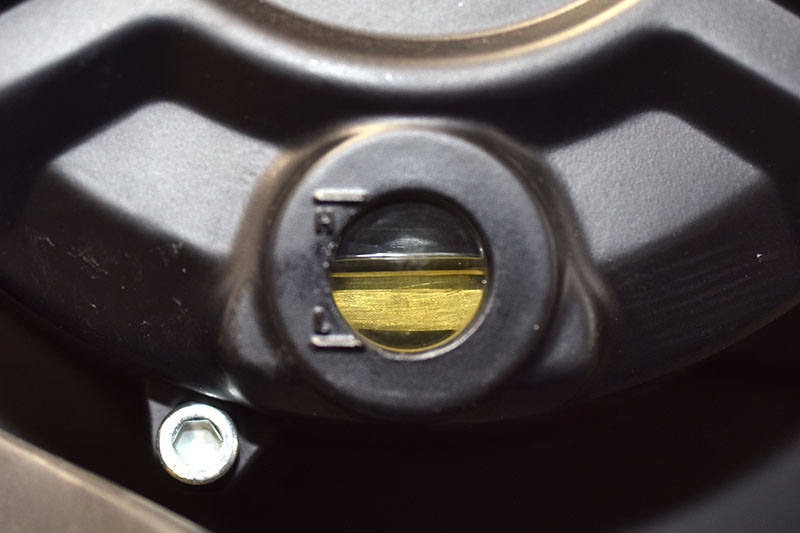
Start the engine and allow the motorcycle to idle for several minutes. Turn the engine off, wait approximately one minute, hold the motorcycle in the vertical position (off the side stand, taking care not to drop the motorcycle), and view the oil level through the view port on the right side of the engine. The engine oil level should be between the upper and lower bounds denoted on the crankcase markings.
Components and Parts
As mentioned above, CSC Motorcycles recommends using non-synthetic motorcycle 10W-40 oil for the first two oil changes. After the first two oil changes, CSC Motorcycles recommends using a synthetic motorcycle oil.
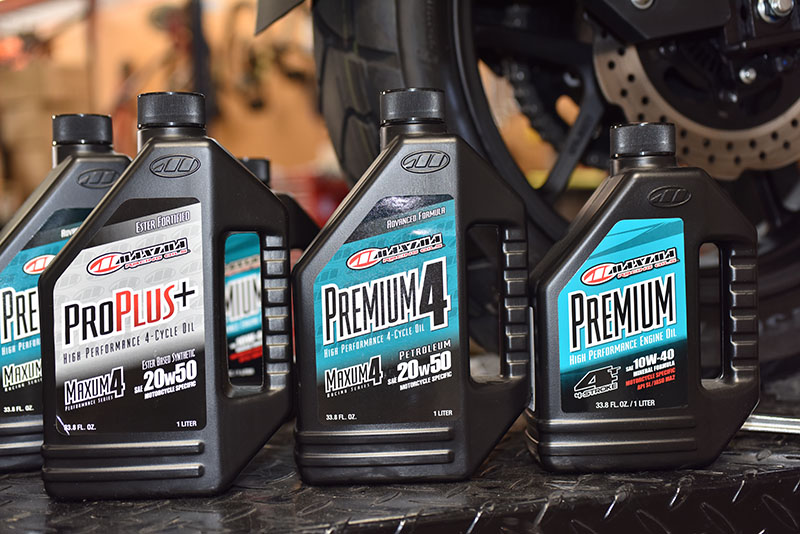
CSC Motorcycles stocks all parts needed for an oil change, including oil filters, crush washers, and oil. Please call us at (800) 884-4173 for any component or lubricant needs.
General Information
- The RX-4 takes 2.0 quarts of 10W-40 or 20W50 motorcycle oil.
- Don’t use car oil or any oil with “friction inhibitors” because this will cause the clutch to slip.
- The first oil change should be at 500 miles, the second oil change should be at 2500 miles, and subsequent oil changes should occur every 2500 miles.
- We recommend using non-synthetic oil on the first and second oil changes, and then switching to synthetic motorcycle oil at the 5000-mile mark.
- The RX-4 has two cleanable and reusable oil strainers (one on the left side of the engine and one on the right side of the engine), and one oil filter (you should replace the oil filter with each oil change).
- The RX4 has a crush washer on the engine drain plug.You should replace the crush washer with each oil change.
- The RX-4 has an oil fill port on the right side of the engine.
- The RX-4 has an oil viewport on the right side of the engine for assessing engine oil level, and the bike needs to be vertical to use it. The engine does not have a dipstick.
- You’ll need a 17mm socket to remove the oil strainer caps and the oil drain plug.
- You’ll need an 8mm socket to remove the oil filter cover nuts and the engine skid plate.
- You’ll need a pair of needle-nosed pliers to withdraw the oil strainers.
- You’ll need a suitable container to capture the oil being drained from the engine.
Procedure
Remove the engine skid plate. The skid plate is attached by four 8mm bolts. Remove the skid plate and set it aside.


Run the engine for a few minutes to warm the oil. This will allow it to drain easily from the engine. After the engine has warmed, turn off the motorcycle. Exercise caution when working on the motorcycle after warming the engine because the exhaust pipe and other components will be hot.
Position a drain pan beneath the engine. Remove the oil drain plug on the bottom of the bottom of the crankcase (the drain plug takes a 17mm bolt head).


The drain plug has a magnetic core to pick up bits of iron in the engine. The magnetic feature will come in handy a bit later for removing the oil filter (to be explained shortly). Clean the metal filings off the drain plug magnet after removing it.
There are two oil strainers on the RX4 engine. Each is secured and sealed with a cap on the engine crankcase. One is on the right side of the engine; the other is on the left side of the engine. These are shown below:


The oil strainer caps are removed with a 17mm socket. When these are removed, oil will drain from the engine, so make sure the oil pan is beneath the oil strainer cap area.

Remove the oil stainers from the left and right side of the motorcycle. You can pull the oil strainers out of the engine using a pair of needle-nosed pliers.

Set the oil strainer covers aside, taking care not to lose the o-rings on the strainers.

Remove the oil filter cover. It is secured by two 8mm bolts.


The oil filter cover has a spring inside that fits between it and the oil filter. The oil filter cover and its spring look like this.

The oil filter cover also has an o-ring. Take care not to get the o-ring dirty or lose it. The spring is orientation insensitive; it can be inserted either way.
Once you have removed the filter cover, you’ll see the metal end of the oil filter.

You can remove the oil filter with a magnet. The tip of the oil drain plug contains a magnet that is useful for withdrawing the filter. In the photo below, the CSC technician is using a magnet mounted on a probe, but the oil drain plug works just as well.

Note that the oil filter is not reversible. The end with the rubber gasket goes into the engine first. Do not attempt to clean the oil filter; you should install a new oil filter with each oil change.
Clean the oil strainers, the oil drain plug, the oil strainer caps, and the oil filter cover and spring using WD 40 or compressed air with a suitable cleaning agent.

After the above parts have been cleaned and dried, apply anti-seize compound to the threads on the oil strainer caps, the oil drain plug, and the oil filter cover bolts.

After removing the oil filter and the oil strainers, additional oil will drain from the engine. Hold the bike in the vertical position so that any remaining oil will drain from the crankcase.
After all oil has drained from the engine, reinstall the oil strainers. The oil strainers are the same on either side of the engine, but they are different on each end of the strainer. Make sure you install the thin end of the oil strainer first. After installing the oil strainers, install the oil strainer caps.
Install a new oil filter. The end with the black rubber gasket goes into the engine first.


After inserting the oil filter in the engine, replace the oil filter cover and spring and secure it with the two 8mm bolts. Take care not to apply excessive torque; it is very easy to strip the engine crankcase threads if these bolts are overtightened.
Reinstall the oil drain plug. Use a new crush washer.
Reinstall the engine skid plate.
Unscrew the oil fill plug on the right side of the engine.

Add 2 quarts of oil to the engine through the oil fill port.

Reinstall the oil fill plug.
Start the engine and allow the motorcycle to idle for several minutes. Turn the engine off, wait approximately one minute, hold the motorcycle in the vertical position (off the side stand, taking care not to drop the motorcycle), and view the oil level through the view port on the right side of the engine. The engine oil level should be between the upper and lower bounds denoted on the crankcase markings.

Components and Parts
As mentioned above, CSC Motorcycles recommends using non-synthetic motorcycle 10W-40 oil for the first two oil changes. After the first two oil changes, CSC Motorcycles recommends using a synthetic motorcycle oil.

CSC Motorcycles stocks all parts needed for an oil change, including oil filters, crush washers, and oil. Please call us at (800) 884-4173 for any component or lubricant needs.
