TT250 Starting System Maintenance Tutorial
The TT250 has both a kickstarter and an electric starter. This maintenance tutorial addresses the TT250 electric start system.
If your TT250 does not start when you press the starter button, the first thing you should check is the engine kill switch to make sure it is in the run position (no kidding; we frequently get calls about bikes not starting, we tell folks to check the kill switch, and we get a meek “never mind” after they have checked the kill switch).
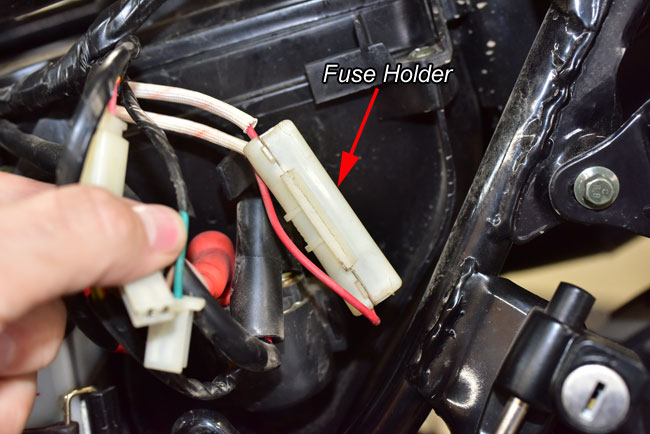
If the kill switch is in the run position and the motorcycle does not crank at all, the next thing to check is the fuse. The fuse is accessible underneath the left body panel.
-
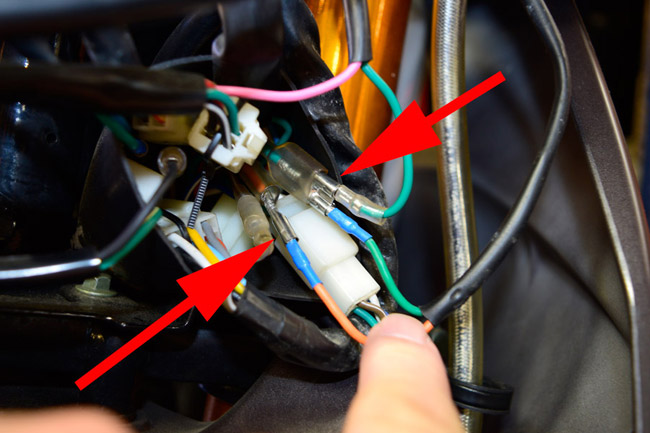
If the fuse is open (blown), you will need to replace it, but before you do, you should find the reason the fuse blew or it is likely you will just blow the fuse again when you replace it. Our most frequently encountered reason for a blown fuse is the wire cluster behind the headlight. Sometimes the connector boots slide away from the connector and permit a short to ground (it’s the first place I’d look). If that is not the problem, examine all of the motorcycle’s wiring and use a multimeter to identify any shorts to ground.
-
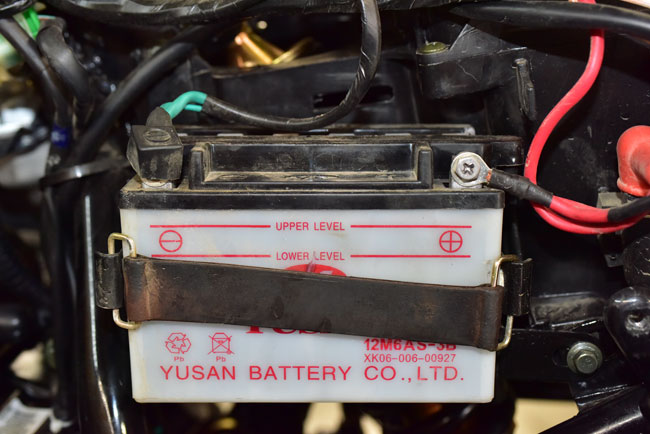
If the fuse is intact and the motorcycle does not crank, next check the battery. Please see our battery maintenance tutorial for this.
-
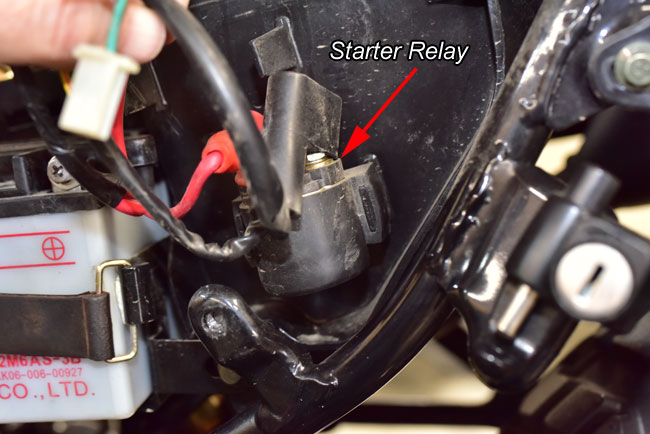
If the battery output is appropriate and the connections are in good shape, check the starter relay. Use a multimeter to confirm voltage is reaching the relay and the relay closes when the starter button is pressed. If the starter relay does not receive voltage when the starter button is pressed, the problem is in the circuit from the starter button. Use a multimeter to isolate the fault and correct any anomalies.
If the starter relay receives electrical energy but it does not close the circuit to the starter, check the starter relay connections. If they are intact and free of corrosion, replace the starter relay. Please call us at (800) 884-4173 if you need a starter relay.
-
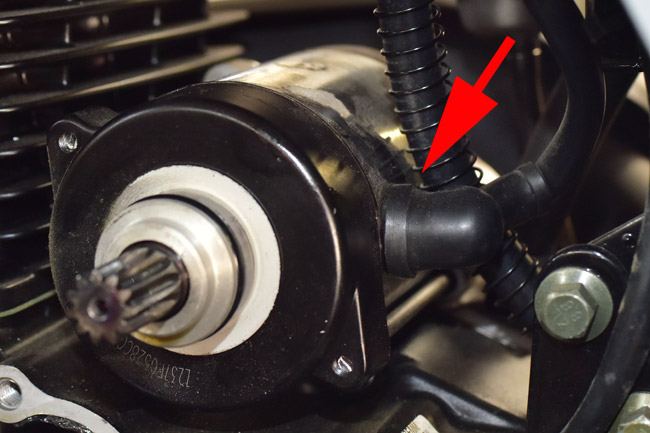
If the starter relay closes, use a multimeter and check to see if electrical energy is reaching the starter motor. The connection is on the starter motor just behind the starter motor case on the left side of the motorcycle.
-
If the starter motor is receiving electrical energy but does not crank, the problem is most likely the starter motor. You will need to remove the exhaust pipe to get access to the starter motor. The starter motor is removed by removing the two bolts retaining it (accessible from the right side of the motorcycle, and the electrical connection (as shown in the photo). If you need a starter motor, please call us at (800) 884-4173.
If the starter motor spins freely but the engine does not turn, either the starter motor output gear is stripped or there is a problem in the starter gear train.
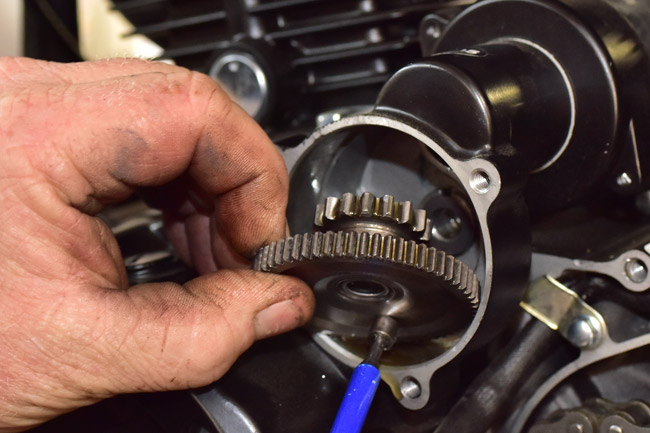
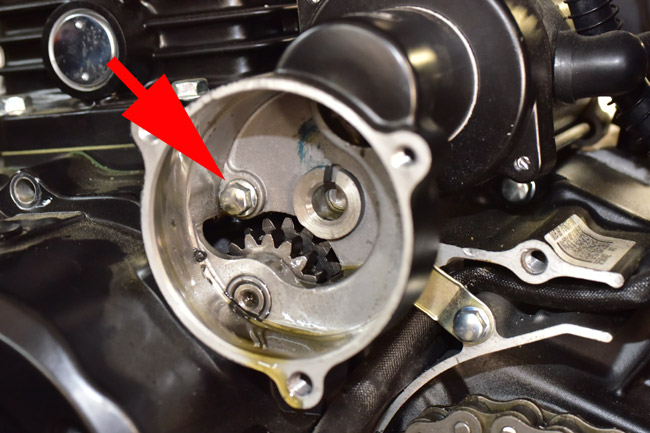
Remove the starter motor transfer gear train cover and examine the gears. The starter motor transfer gear train cover is restrained by three 8mm bolts. If the starter motor output gear or the gear train exhibits any anomalies, replace any defective components. Please call us at (800) 884-4173 for replacement parts. Note that the gear cluster has thin shims on either side; take care not to lose these.
-
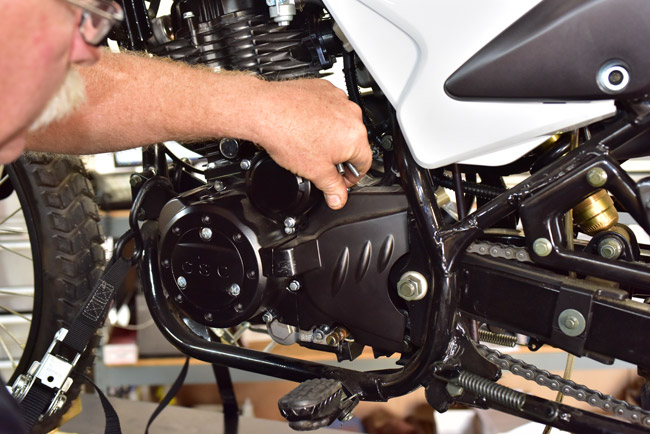
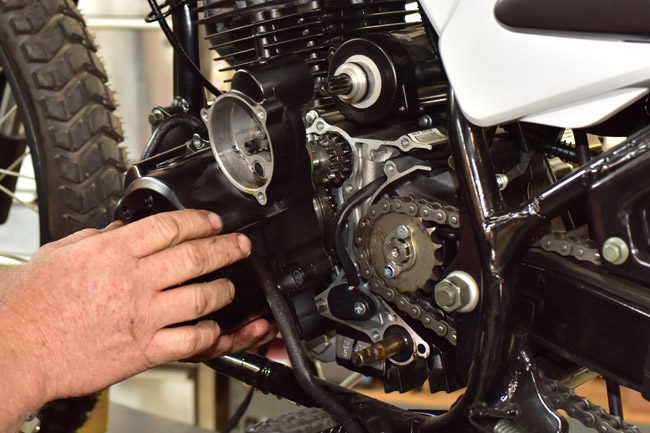
If no defects are apparent, it will be necessary to remove the left engine crankcase cover for further troubleshooting.
Place a drip pan under the engine, as engine oil will escape from the engine during the following steps.
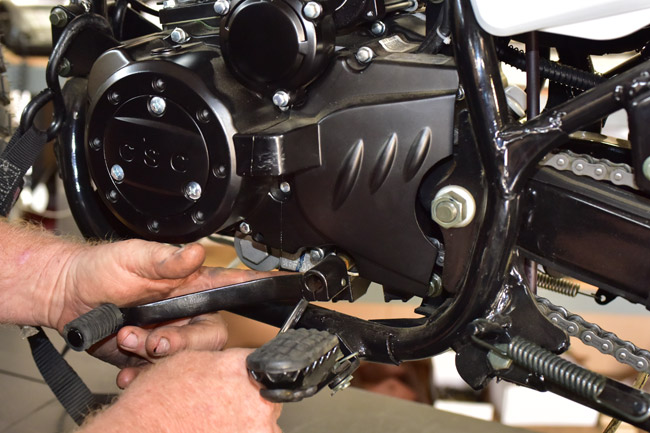
Remove the gear shift lever. -
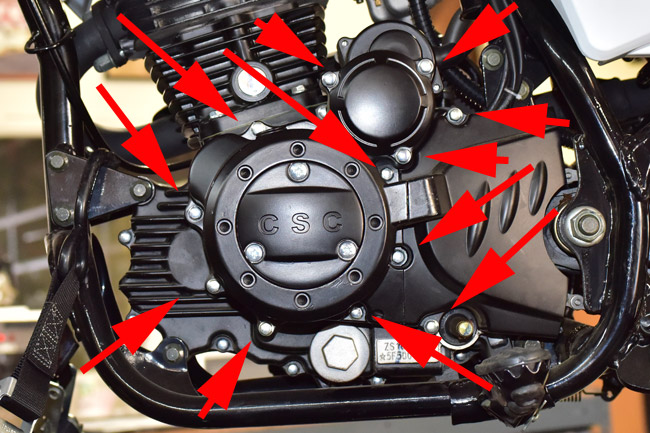
The left engine crankcase cover and the countershaft cover are secured by several 8mm bolts. Remove all of them. Note that the bolts are of differing lengths.
-
Remove the countershaft sprocket cover.
-
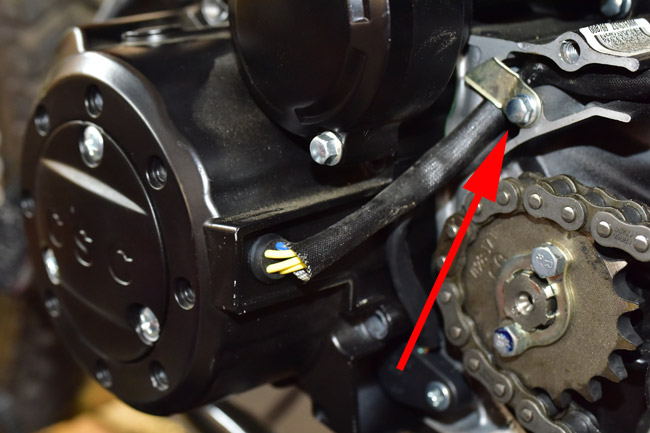
Remove the charging circuit harness retention clip.
-
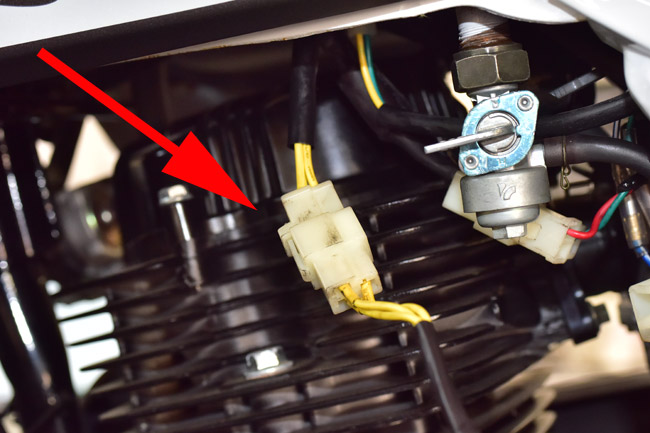
Disconnect the charging circuit connector plug.
-
Unbolt the 8mm bolt inside the starter motor transfer case.
-
Gently remove the left engine crankcase cover.
-
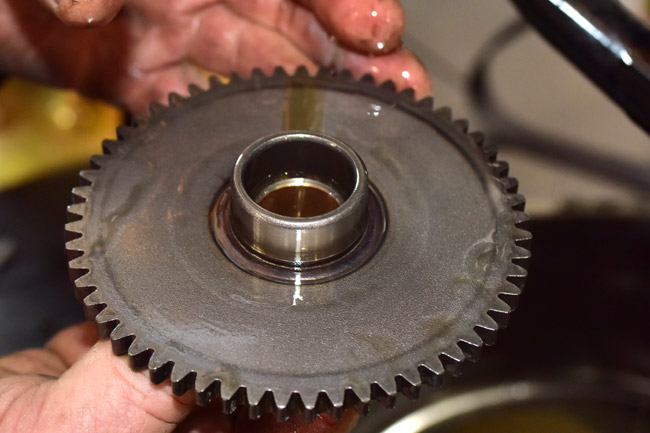
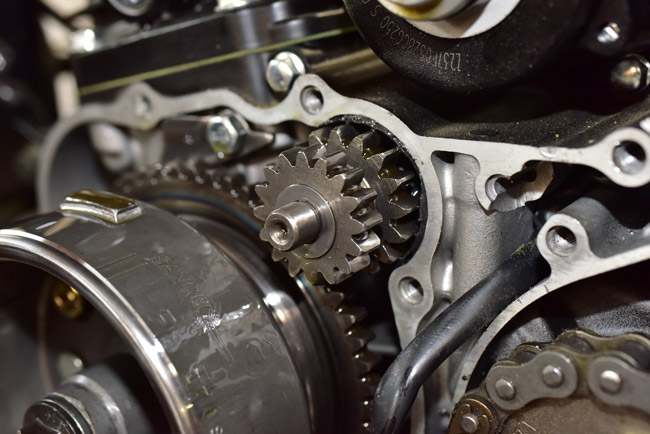
Check the two drive gears that interface with the starter motor gear transfer gears and the engine start drive gear. Note that the gear cluster has thin shims on either side; take care not to lose these. If either is damaged, replace the transfer gears. If you need replacement gears, please call us at (800) 884-4173.
-
Check the engine start drive gear behind the rotor. Examine the engine start drive gear for any defects. Check for rotation; the engine start drive gear should rotate in only one direction. If it can be rotated in either direction, the sprag clutch is defective and it must be replaced. If the engine start drive gear is defective, it must be replaced. If you need replacement parts, please call us at (800) 884-4173.
-
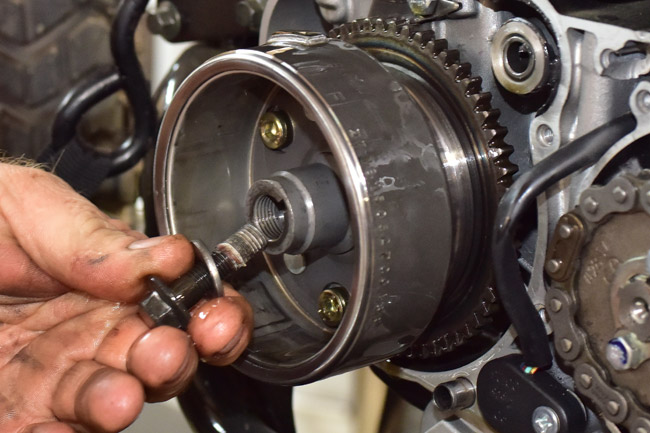
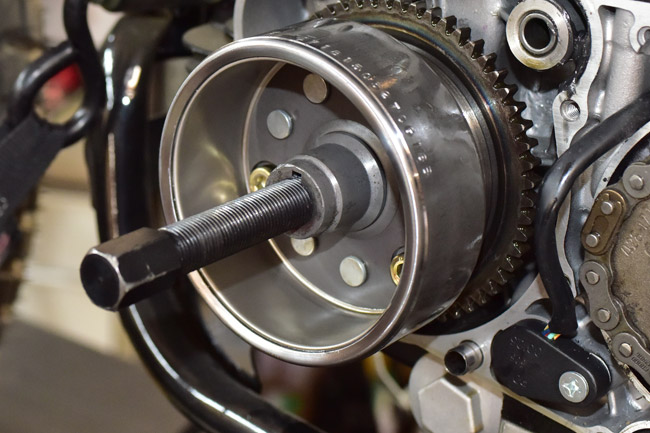
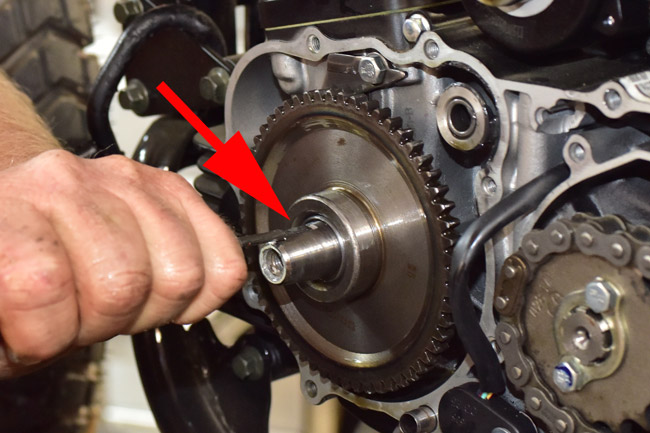
If you need to replace the engine start drive gear or the sprag clutch, you will have to remove the rotor. To do so, remove the rotor attach bolt.

-
Remove the rotor with a gear puller. If you need the gear puller, we sell them. Please call us at (800) 884-4173.
-
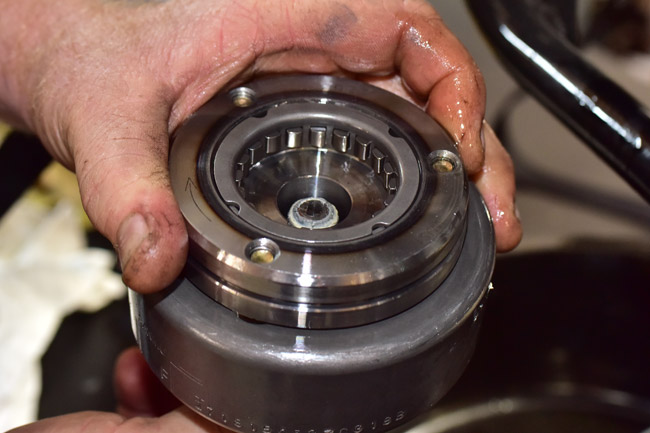
After you have removed the rotor, you will see the engine start drive gear sprag clutch. This clutch drives the engine start drive gear in one direction only. After the engine has started, the crankshaft and the engine start drive gear can spin freely in the sprag clutch.
Inspect the sprag clutch for any damage. Remove the sprag clutch from the rotor and replace the sprag clutch if it is damaged or if it allows the engine start drive gear to spin in either direction.
-
After removing the rotor, remove the engine start drive gear if it is damaged. To do so, you must remove the small Woodruff key that indexes the engine start drive gear to the crankshaft. Gently tap the Woodruff key out with a screwdriver and a hammer.
-
Remove the engine start drive gear. If you need a replacement engine start drive gear, please call us at (800) 884-4173.
-
Assembly is the reverse of disassembly. When assembling the left engine cover to the engine, use a new gasket (please call us at (800) 884-4173 if you need a new gasket). Apply Loctite to the rotor crankcase bolt and torque the rotor crankcase bolt to 60 N-m. Torque the engine cover mounting and countershaft cover bolts to 9 N-m.