TT250 49T Sprocket Installation
I have our new 49T sprocket on my TT250, and it makes a huge difference in how the bike performs. The 49T sprocket really helps the bike for street riding. I think that with the 17T front sprocket the 49T rear sprocket is ideal. I haven’t tried a 48T, a 47T, or really anything else other than the 49T, so I can’t comment on them.
In case you were wondering, here’s what the gear ratios look like with the various sprocket combos…
-

The stock TT250 setup is the 17T/50T combo. It’s okay, but I felt it was slightly undergeared for street use. What that means to me is that the engine was fully wound out in top gear, and it felt like it could have pulled a bit more top end with a slightly taller gear ratio.
We went with the 49T because it would provide a taller gear ratio and it was available. None of our sources had the 48T or 47T sprocket available. If you can’t buy them, you can’t test them. The bike might pull the 48T or perhaps even the 47T (and when I say “pull,” I mean the engine will wind all the way out). You can keep gearing a bike taller, but at some point, the engine can’t get high enough in the RPM range to overcome aerodynamic drag, and you can actually lose top end by gearing the bike taller. My Z06 Corvette is like that; you have to drop down to 5th gear (from 6th) to attain the car’s top speed of 173 mph (or so I’ve been told).
Anyway, I like the 17T/49T combo. You may feel differently, but it’s what I found works. Another reason I like it is that we didn’t have to mess with the chain with this combo. The stock chain length works.
So, with all of the above out of the way, let me take a few minutes to walk you through the 49T sprocket installation process. I’ll first refer you to our TT250 maintenance tutorial on rear wheel removal. It will show you how to remove the TT250’s rear wheel, which you’ll need to do to install the new rear sprocket.
Once the rear wheel is removed, remove the large Circlip on the wheel hub…
-
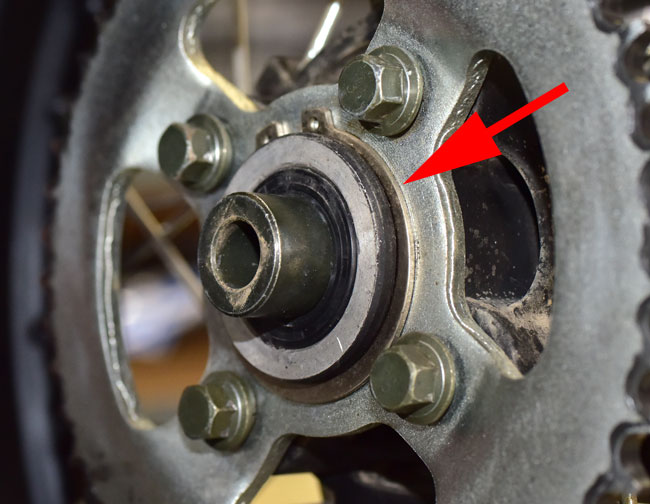
We’ve had people ask about Circlip on the hub with the new sprocket. Hey, that Circlip doesn’t do anything once the bike is assembled…it’s just along for the ride. It has no operational function. As nearly as we can guess, it’s an assembly aid when the motorcycle is manufactured. Leave it off. Like my friends in New Jersey say, fuhhgeddaboutit.
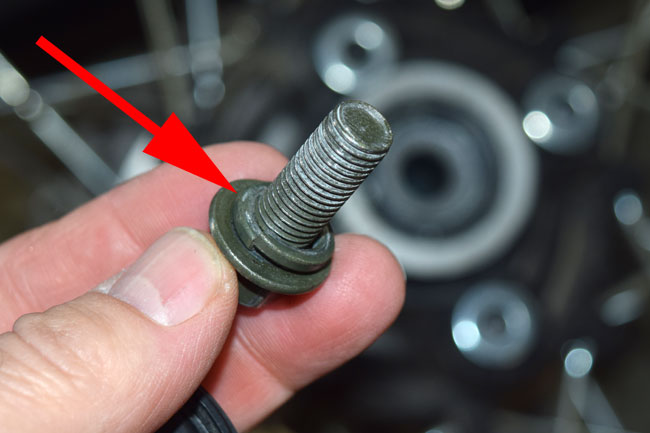
Remove the four bolts securing the old sprocket. They have lock washers underneath; hang on to them.
Next, place two washers over each hole in the hub (a silver one and a black one). We put the dark one next to the hub and the silver one on top…
-
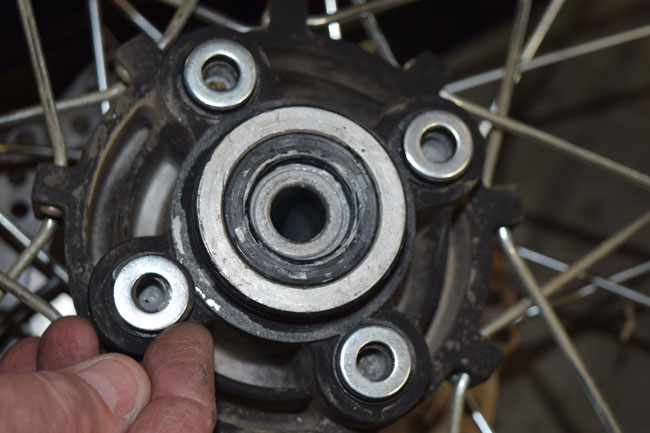
This is how the washers should look under the sprocket…
-
Now put the sprocket on top of the hub, with the dished side out (i.e., facing away from the hub) …
-
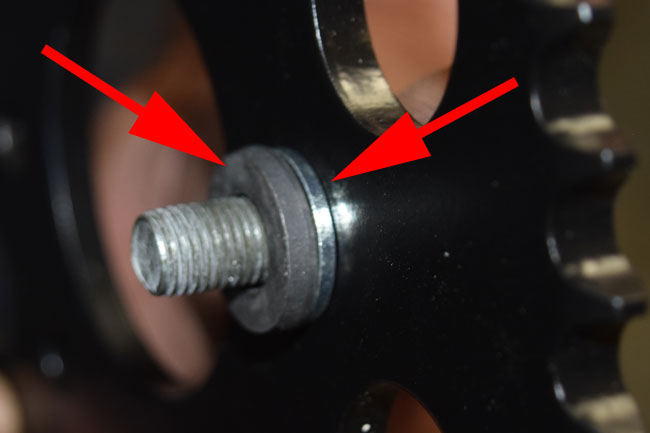
Put a dab of blue Loctite on each of the four bolts, install a lockwasher underneath the bolt head, and tighten the bolts to 35 lb-ft.

-
And that’s about it. Reinstall the rear wheel in accordance with our previously published maintenance tutorial, and you’ll be on your way.