RX3 Cyclone Chain Adjustment
Our maintenance topic du jour is chain adjustment, which is a bit of a misnomer because adjusting the chain on a motorcycle is actually two jobs: Adjusting chain tension and aligning the rear wheel. The challenge here is to both achieve the correct tension in the chain and to align the rear wheel while we are doing so.
You should check the chain adjustment at your motorcycle’s first scheduled maintenance and every maintenance thereafter. You’ll most likely see the biggest need for adjustment at the first service interval, because chains do most of their stretching in their first several hundred miles of use.
The first step is to check your chain slack. Zongshen advises 10mm to 25 mm of chain slack, which is indicated by a decal on the left swingarm.
-
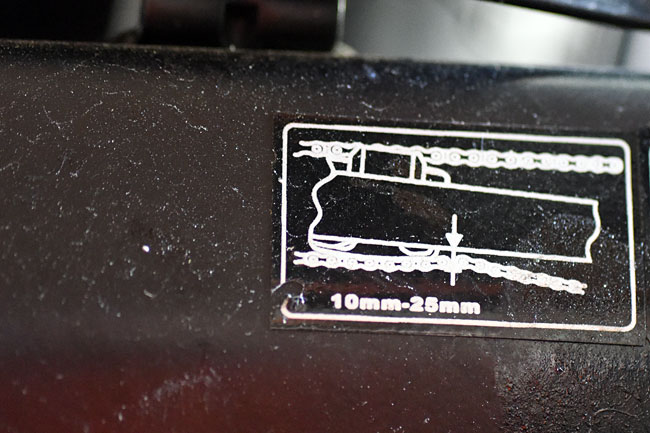
The decal is a bit misleading, and I believe 10mm is a bit on the tight side. On adventure touring bikes with long swingarms such as the RX3, I like to set the chain a bit on the loose side. I adjust the chain slack to be between 3/4 of an inch and 1 inch (25mm, the high side of the Zongshen recommendation, is just under 1 inch).
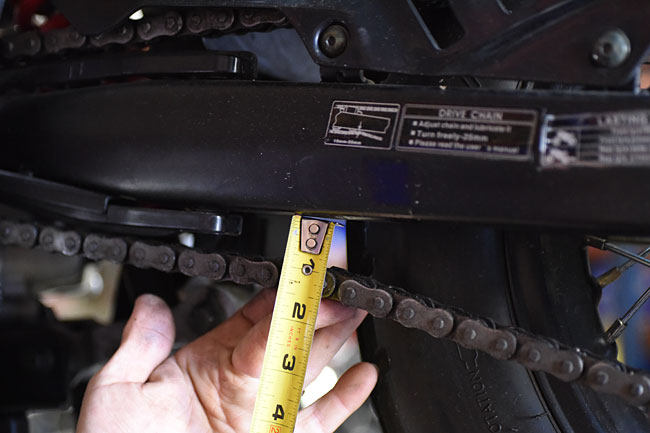
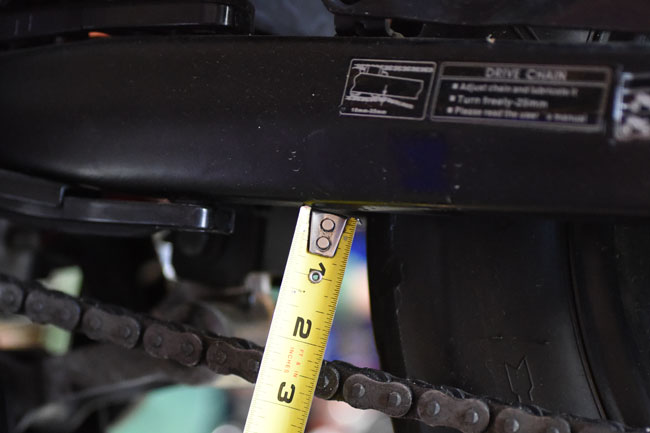
You generally measure chain slack by flexing the lower portion of the chain up and down on the bottom run (between the front and rear sprockets) and measuring the amount of “play” from top to bottom. You get varying opinions as to whether the rider should be on the bike or not. I do it with no rider on the bike, but with the motorcycle on the sidestand. This puts the weight of the motorcycle on the wheels and takes up some of the “sink” from the bike compressing the suspension. I’ll push the chain all the way up, and then pull it all the way down and compare the readings on a ruler or a tape, as you see in the photos below…and as you can see in these photos, this chain is a bit too loose.
-
-
Let’s assume you’ve done this and you find the chain is either too tight or too loose. When this occurs, we need to loosen (not remove) the rear axle, and loosen the chain adjustors on both aft ends of the swingarm.
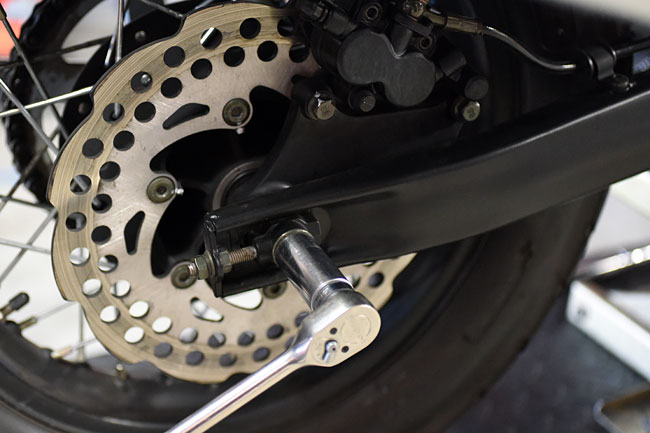
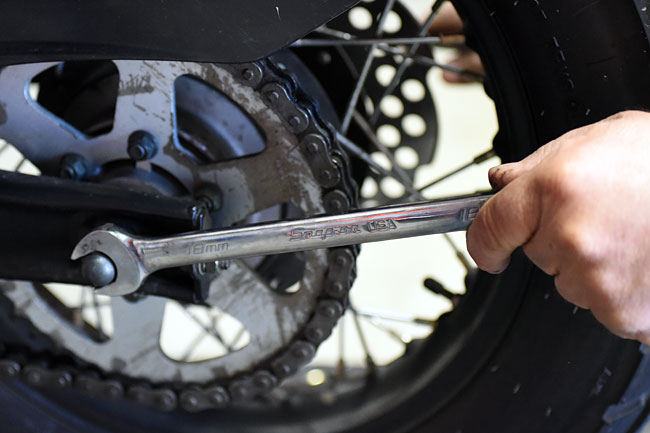
Let’s approach the rear axle bolt first. The rear axle bolt takes a different wrench/socket size at its two ends. The bolt head is 18mm on the left side of the bike, and the rear axle nut is 17mm on the right side of the bike.
Loosen the rear axle with either wrenches or sockets. You don’t need it to be real loose. Finger tight is good enough. We just want to be able to move the rear axle back and forth in the swingarm after we loosen it.
-
-
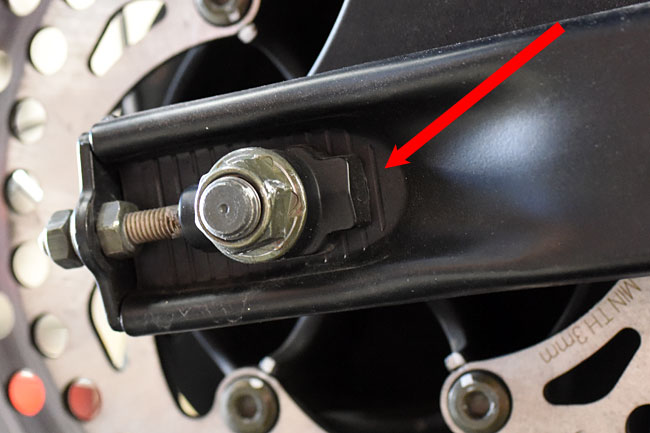
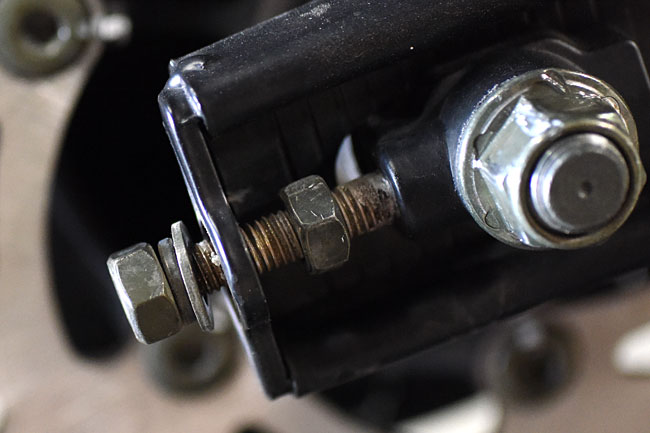
Next, loosen the chain adjustors on both sides of the swingarm. These adjustors have two nuts, one on each side of the adjustment plate, as shown below. Note that in the photo below, the rear axle adjustor nuts have already been loosened.
-
This is where it gets interesting. Our challenge at this point is to drive the rear axle either forward or rearward using the rear axle adjustor nuts while simultaneously positioning the rear axle such that we achieve the desired chain tension (as described above) and we maintain rear wheel alignment.
Use the rear axle adjustor nuts to move the wheel either forward or backward. The inside nut moves the wheel forward, and the outside nut moves the wheel backward. Note that there are no washers between the inside nut and where it bottoms against the end of the swingarm, and that there is both a flat washer and a lockwasher between the outside nut and the end of the swingarm. Both axle adjustor nuts are 13mm.
The trick is to get the wheel aligned and the chain properly tensioned. You need to check both rear axle alignment and chain tension as you make these adjustments.
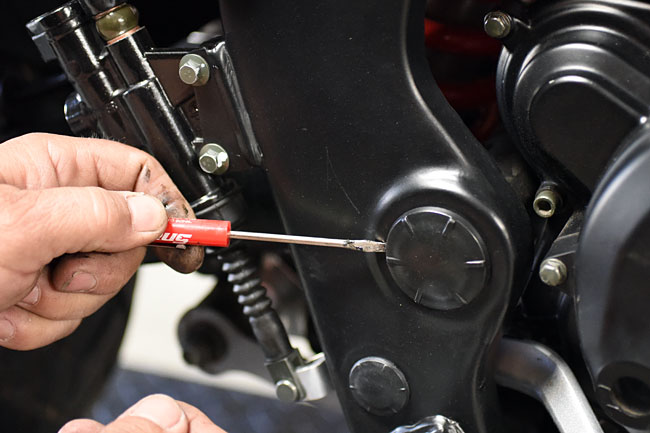
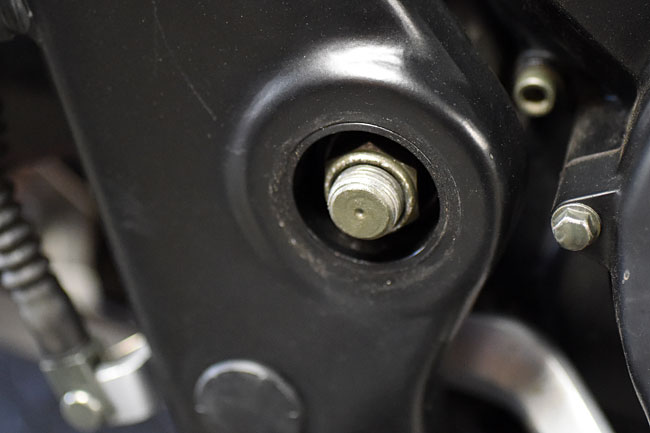
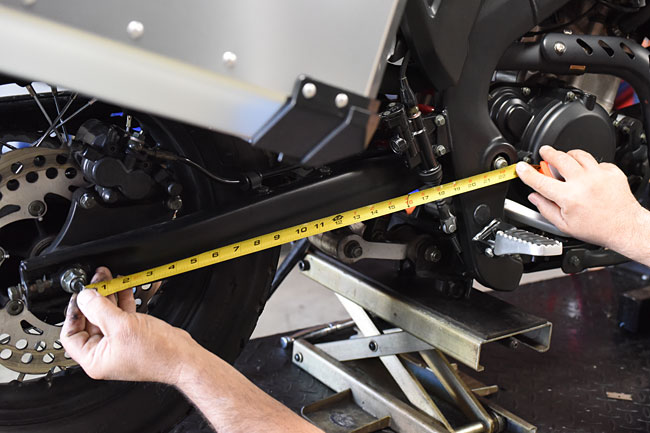
To attain correct alignment, there are two approaches. You can actually measure the distance between the center of the swingarm pivot point and the center of the rear axle (as shown in the photo below), or you can observe the location of the adjustor on the swingarm scribe marks. The photos below show both approaches. I prefer actually measuring the distance (the first approach) because on many motorcycles the scribe marks are not always accurate. When we do this, you can pop the plastic swingarm pivot point covers off with a small screwdriver. On the RX3 used for the chain adjustment in these photos, we found that when the rear axle was perfectly aligned, the rear axle adjustors were perfectly placed with respect to the swingarm scribe lines on both sides of the motorcycle.
-
-
-
The above photos showed us checking rear wheel alignment by measuring the distance between the swingarm pivot point and the rear axle. The other approach (as mentioned above) is to check the scribe marks on the swingarm, and use these to compare the relative position of the adjustors on both sides of the motorcycle.
-
Once the axle is aligned and the chain tension is where it needs to be, you can tighten the rear axle nut. I always check the chain tension again after tightening the rear axle nut just to make sure it hasn’t moved. After doing that, tighten all four of the axle adjustor nuts, and you are good to go!